All posts by Scott Dimmick

Papier Mache Pumpkins – Part 1

I’ve been a big fan of Halloween since I was a kid and I’ve always enjoyed setting up haunted houses and having really cool costumes. I joined the Rocky Mountain Haunters group last year shortly after Halloween. I didn’t attend any of the gatherings this year because of other commitments and, to be honest, I was a little intimidated by some of the projects. In one of the threads in our group, someone mentioned the pumpkins at Stolloween.com and I immediately knew that I could do the same kinds of projects that Scott Stoll makes. These are my first attempt at using papier mache techniques to create inexpensive, simple Halloween props.

Fill a bag with newspaper.
newspaper
Wrap string around the bag to create the bumps in the pumpkin.
Put masking tape over the string and tape down any lose parts of the bag.
My boys had fun helping me. It's really not a hard process.
My boys had fun helping me. It’s really not a hard process.
Mix up the papier mache glue in a bowl or bucket. Check out Stolloween.com's Basics page for the recipe.
Mix up the papier mache glue in a bowl or bucket. Check out Stolloween.com’s Basics page for the recipe.
When finished with all the layers cut a hole in the bottom and remove the newspaper and bag.
We made a bunch of different sizes and shapes.
Be creative and add arms or whatever you want.

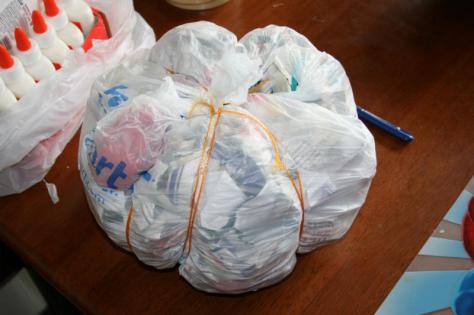
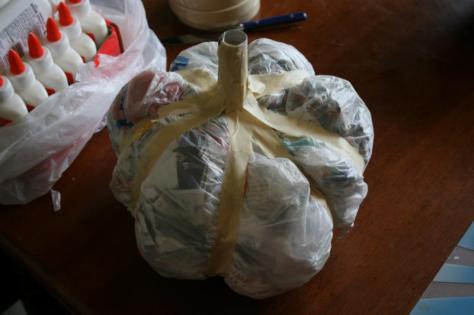
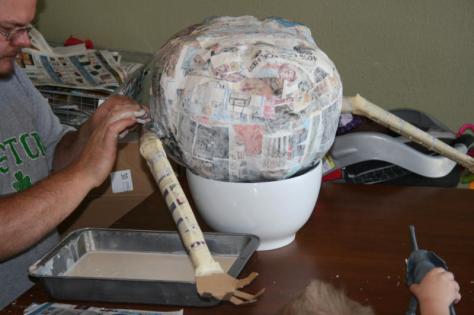
So, this is part 1 for the pumpkins. I will follow with cutting out the faces and building up the features. Then we will paint them.